Add Applicant Level Dynamic Content to an Email Message
In the Journey section of Unite, you can use dynamic expressions to personalize emails before they are sent. If you use a dynamic expression for dynamic content, Unite places a value that can change based on the context where you use the message. The value may be different depending on where you use the message and who receives it. Whether you are adding contact level data or application-level data, the steps are different. When adding contact level data, you use the personalization feature to add the dynamic content. When adding application-level data or Contact level UDF’s, you must use a ForEach Loop. A ForEach Loop is coding that as a user, you will need to enter and edit to pull the correct information
Fields that are located on the Contact entity can be merged without a ForEach Loop. If you would like to merge any application-level data or UDF fields, the UDF must be located on the Contact entity (not an application UDF), and would require a ForEach Loop.
To add a ForEach Loop into an email
-
Open a browser and log on to Unite.
-
On the main menu, click JOURNEYS.
-
On the navigation pane, click Marketing emails.
-
Add a new email or open an existing email record. Please note that if you open an existing email record, ensure the record is in draft status before making edits.
-
Verify you are on the Design tab
-
Depending on the size of your computer screen, the ForEach button may show in the top right-hand corner, or you may need to click the vertical three dots to choose more options, and then click the
 button.
 -
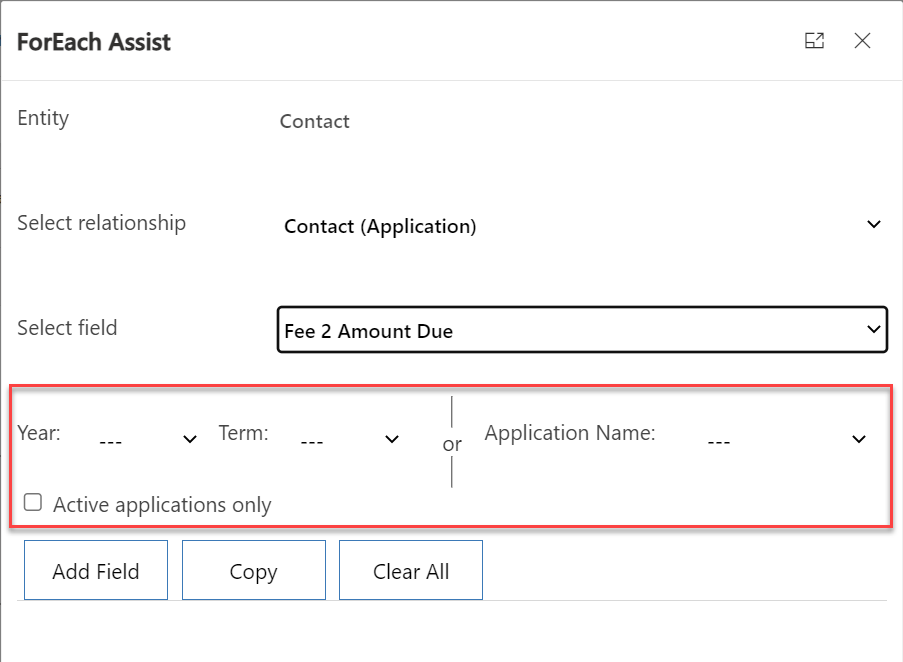
On the ForEach Assist window, select the relationship. Depending on the field you are looking to merge, select application-level data or contact UDF field: (Contact nnnn Contact UDF) or Contact (Application).
-
From the Select field list box, select the field containing the data you want to insert.
-
If you chose Contact (Application) as the relationship, prior to selecting ‘Add Field’, there is an option to filter the content to a specific year AND term, a specific application name, or selecting the check box of ‘active applications only.’
Note about terms
Some schools may have multiple terms or applications that are active at same time. For example, applicant could have an application open for summer AND fall. Selecting the specific year and term is very important in this case. If an applicant can only have one active application open at a time at your school, selecting the ‘Active applications only’ may be the best option.
-
Once you have selected the field containing the data you want to insert, select Add Field.
Useful Tip
Best practice is to add all fields into one ForEach loop, meaning from the ForEach assist window, add all fields you would like merged at once, in the order they would appear in the email, by repeating steps 8 and 9 before copying into the email body. Once you have all fields in the For Each Assist, move on to step 11.
-
The ForEach code will appear, select copy or highlight code, and use keyboard function Ctrl-C.
-
Close the ForEach Assist window.
-
Place your cursor in the body of the email.
-
Use keyboard function Ctrl-V to paste into your text element of your email.
-
Finish typing your email around the ForEach code to have the body of the email flow with the dynamic content.
-
Use Preview and test to select a person to preview the merge data. You may also choose to do a test send to your own email address, previewing as the selected person.
Opening and Closing a ForEach Loop
“{{#each contact.lsac_application_contact_lsac_contact}}{{#if(eq contact.lsac_application_contact_lsac_contact)}}” portion of the ForEach opens the loop.
“{{/if}}{{/each}}” closes the loop.
Previewing Tip
If your test person has the information in Unite and it is not populating in the test email, there is an issue. Review your ForEach code and verify everything is correct.
If you do not have a person who has all the information to populate in the preview, you can copy/paste the email that you created in production and paste into your testing environment (Sandbox). You may also copy/paste the HTML if you prefer.
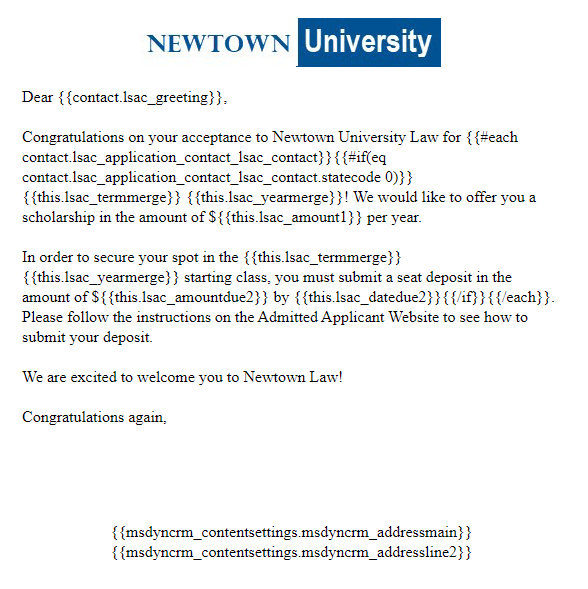
Example email (This example is using active application):