
About Word Reports
In Unite, you can run a Word report to work with or generate form letters. Each time you run a Word report, the output you select determines what Unite does. The following table provides a list and description of the outputs you can select.
Output |
Description |
|---|---|
| Download Files | This output provides a count of returned records and allows you to download the mail merge data source (.CSV) and the mail merge document (.DOC). |
| Download Files/Check Out | This output provides a count of returned records, locks the mail merge data source (.CSV) and the mail merge document (.DOC) so that no one can use the files, and allows you to download the files for your use only. |
| Microsoft Word Preview | This output provides a count of returned records and allows you to download an MS Word file with completed form letters. |
| Undo Checkout | This output makes the file available for others to use. |
| Upload Files/Check In | This output allows you to upload the mail merge document (.DOC) for the report and makes the document available for others to use the file. |
As illustrated in the image below, you work with saved Word reports on the Word grid.

As long as there is a condition saved with a Word report, you can select an output and run the report right from the grid. On the Word grid, you can also see the number of times the report has been run as well as the last user who ran the report.
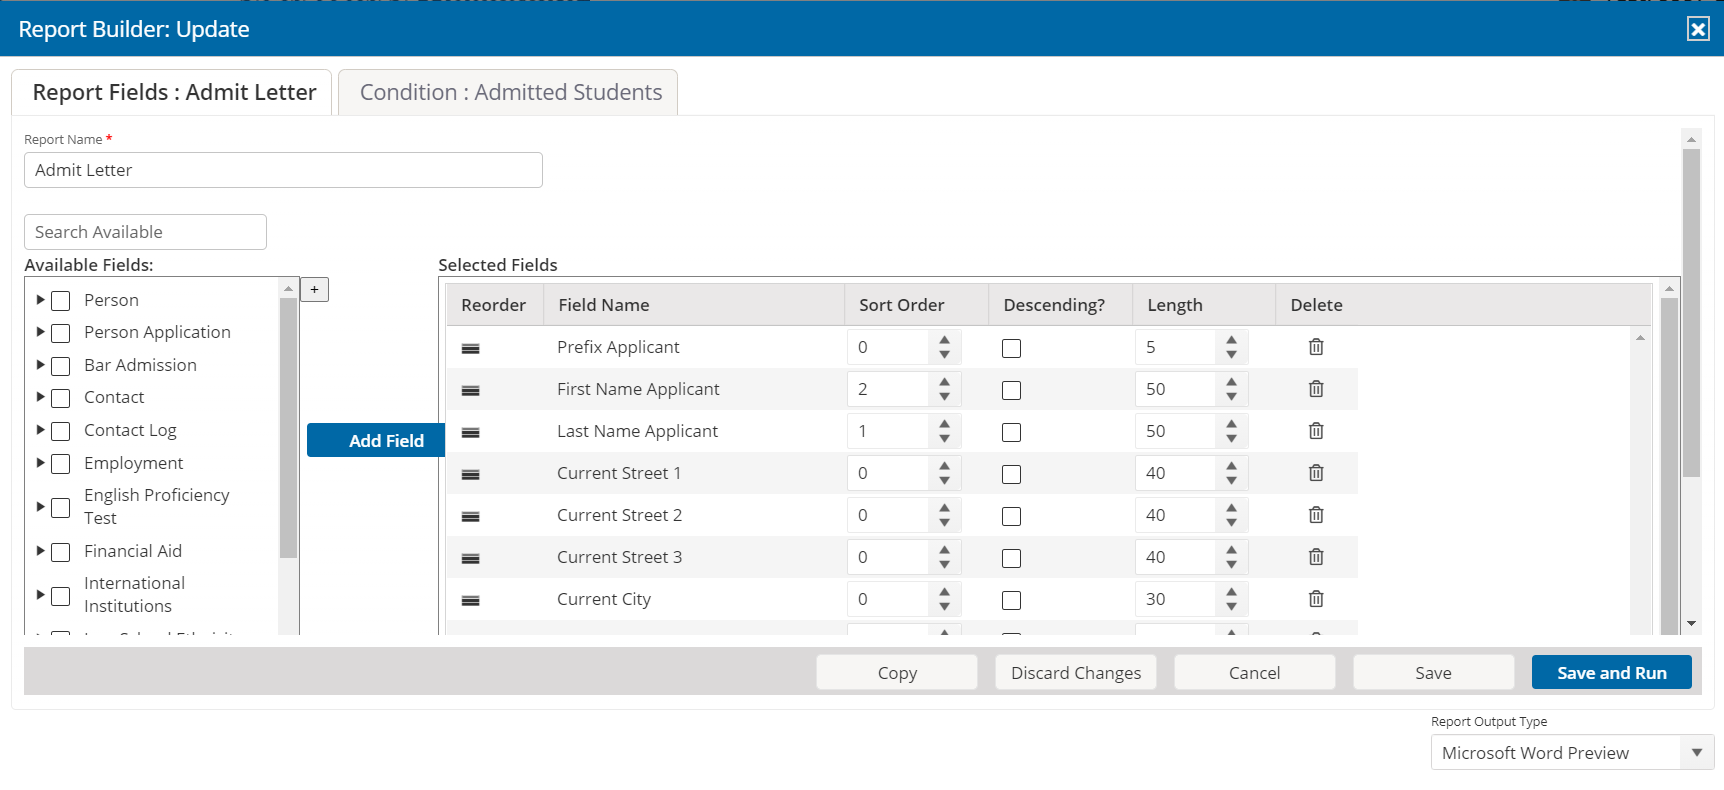
You can add any number of Word reports to Unite, and you can edit and delete reports as needed. For each report, you select the fields and define the conditions to generate the output you want. The fields you select for the report should match the fields that are in the mail merge document (.DOC). The conditions determine which people should receive the form letter. Before you can define report conditions, you must add at least one field to the report. Each Word report and report condition must have a unique name for identification.
As illustrated in the following image, the Report Builder window provides everything you need to add, edit, delete, and configure fields for a Word report.
The Report Builder window also provides everything you need to add, edit, delete, and configure report conditions, as illustrated in the following image.
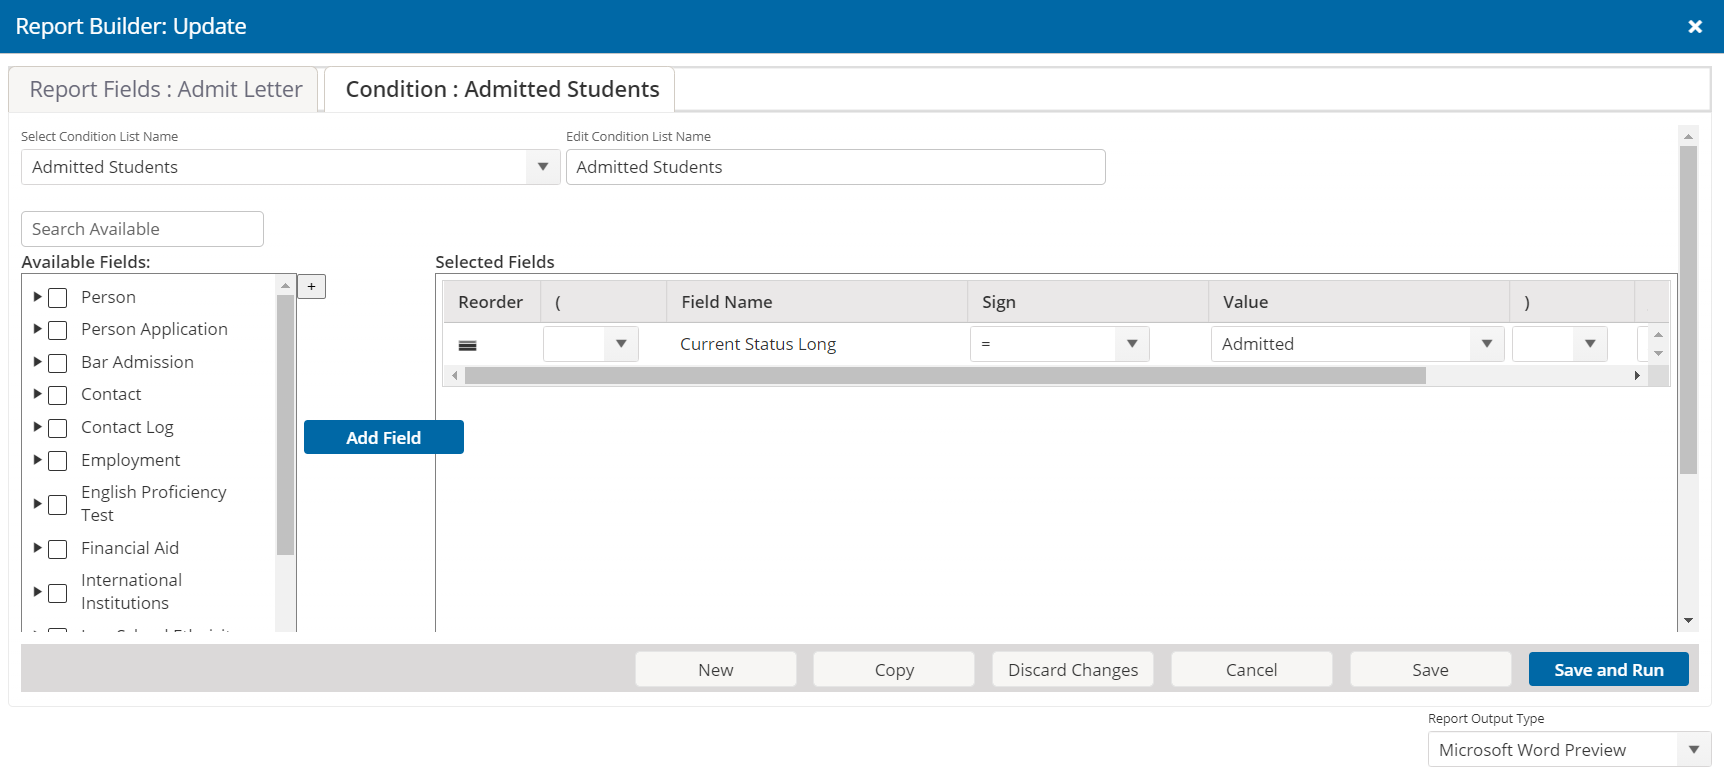
Just as you are able to search and add fields that you want to include on a report, you are also able to search and add fields to define the report conditions. Fields come from person and application records.
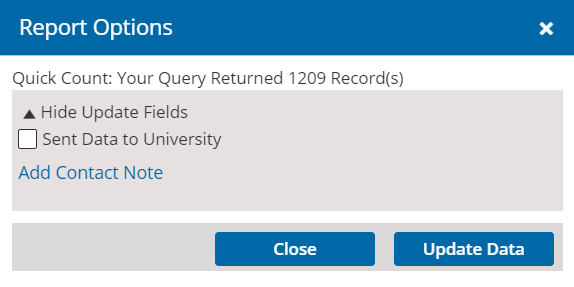
There are a number of options you may have after you run a Word report depending on the output you select. As illustrated in the image below, the report options for an output that generates a Word file with generated form letters include a quick count of the returned records as well as options to add a contact note to the person record for each person included on the report and select the Sent Data to University option.
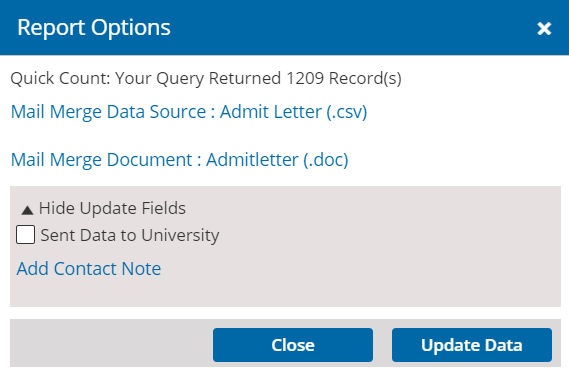
As illustrated in the image below, the report options for an output that downloads files include a quick count of the returned records as well as options to download the mail merge source data file (.CSV), download the mail merge document (.DOC), add a contact note to the person record for each person included on the report, and select the Sent Data to University option.
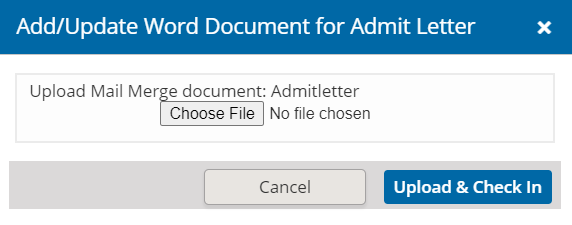
As illustrated in the image below, the report options for an output that uploads files include the option to choose the mail merge document (.DOC) that you want to upload for report.
At any time after you add a Word report to Unite, you can edit or delete the report. You can also create a new report from a copy of a report.