
About Email Records
In Unite, each email has a record that contains email settings, design settings, and analytics. The following image illustrates a new email record.
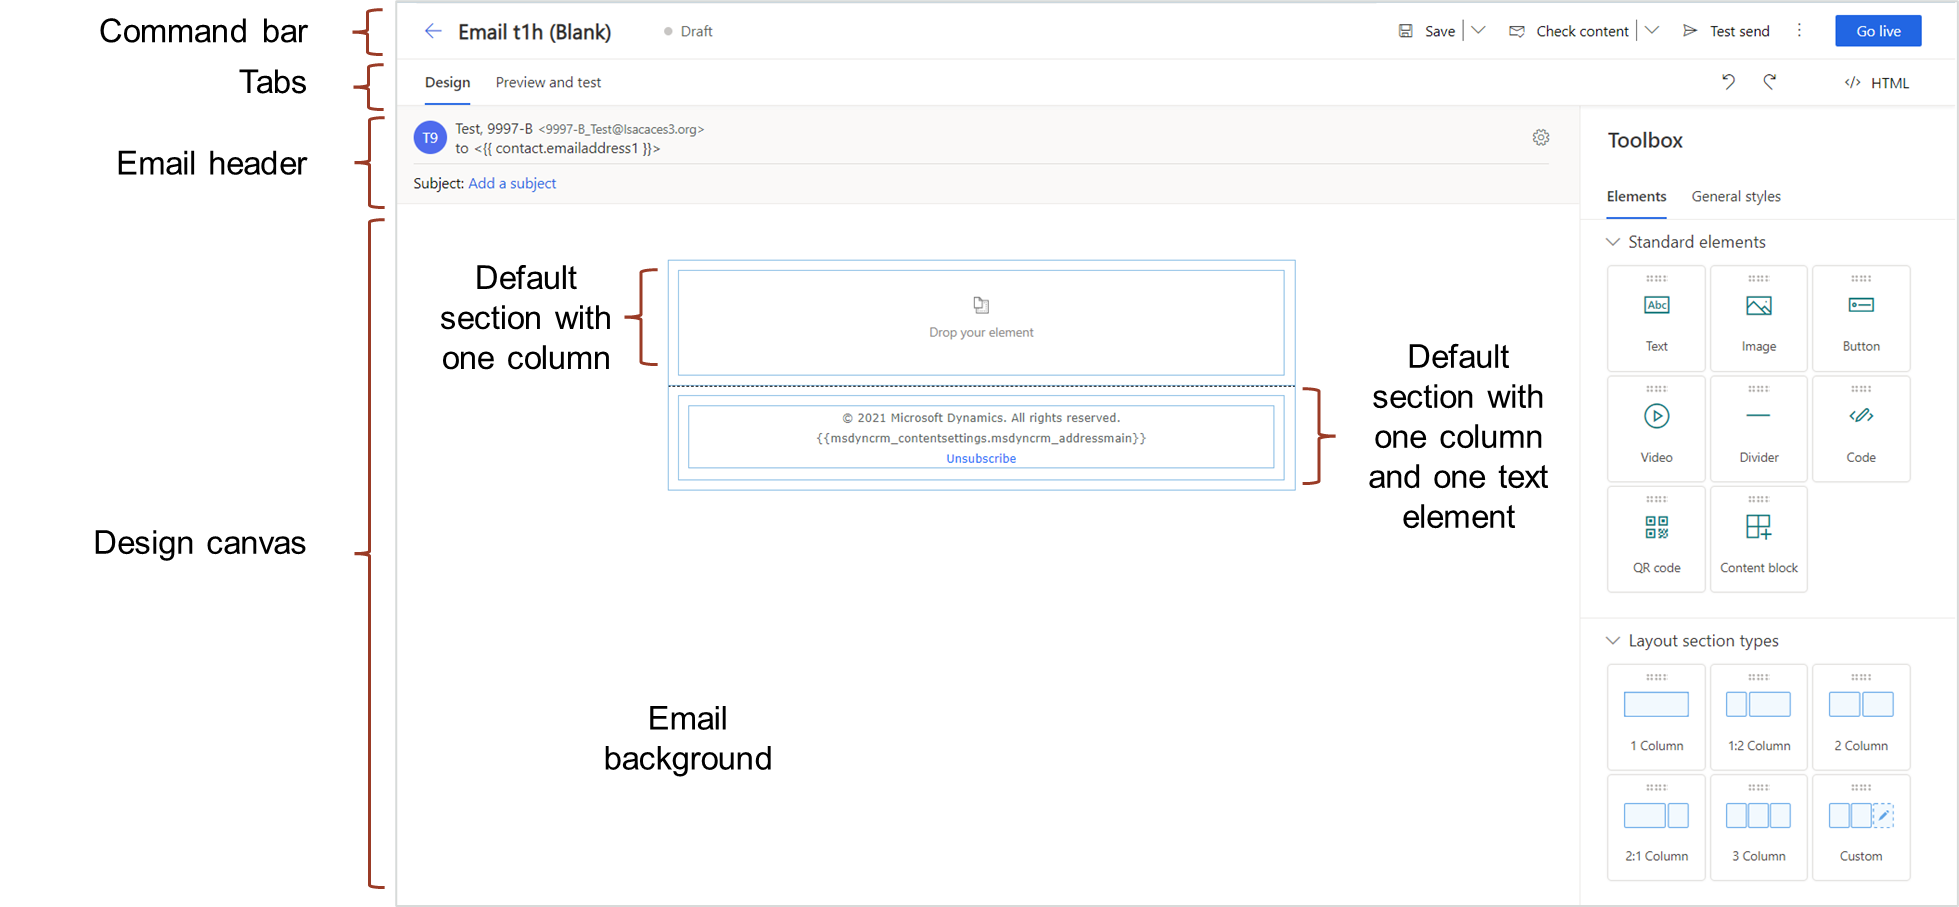
At the top is a command bar with the email name, publication status, and several commands to work with the record. You can save an email, check an email for errors, check an email for accessibility, check the spam risk factor, send a test message, and publish the email for use in a customer journey.
By default, there are two tabs on each new email record – the Design tab and the Preview and test tab. If you publish an email, the Insights tab replaces the Preview and test tab.
About the Design Tab
When you open an email record, you default to the Design tab where you can design your email message. The email header is separate from the design canvas. Shown in the picture below, the email header contains the subject as well as general settings for the email.
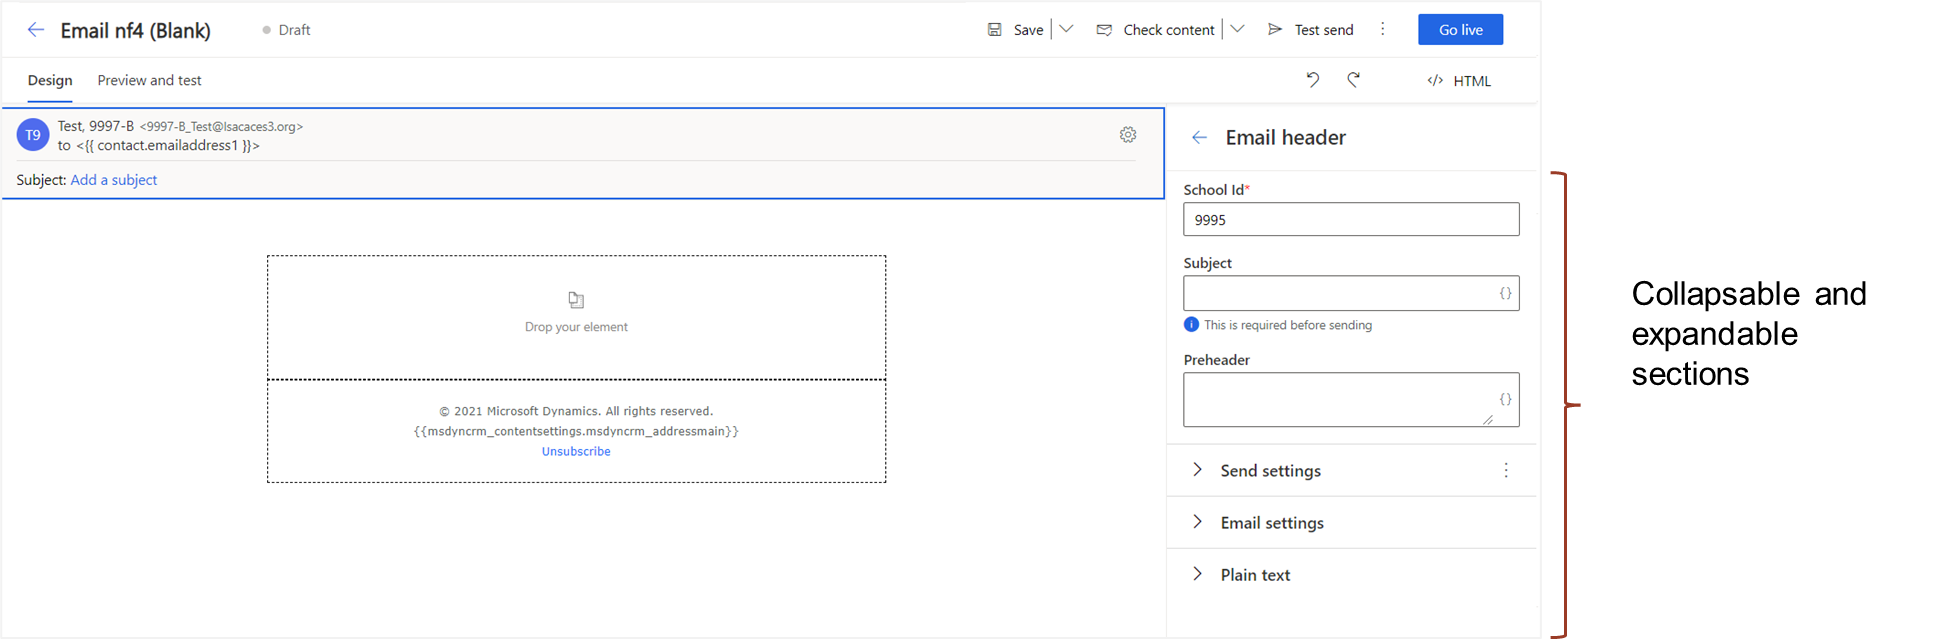
Email header settings are organized on expandable and collapsible sections and include send settings, general email settings, and plain text settings. Unless you are running two instances of Unite, the School Id automatically populates for you. If you are running a JD instance and an LLM instance of Unite, the default School Id populates and you may need to change it.
The design canvas is where you design your email message. You can configure background settings. You can change the layout and configure settings for each section and column in the layout. You can add standard elements and configure settings for each element.
By default, there are two sections. The first section is for the email message. The second section is for the email footer. The email footer includes two dynamic expressions for your school address, as well as a link to unsubscribe from commercial emails.
There are eight types of elements you can drag and drop into columns for different sections. The following table provides a list and description of the different elements you can add to an email design.
Design Element |
Description |
|---|---|
| Text | Use text elements to add a block of text within a column. Use the text-element toolbar to format the text, as well as insert dynamic content, images, and links. |
| Image | Use image elements to add an image to a column, outside of a text element. Images must be added and be active in the Unite image library in order to add to an email message. |
| Button | Use button elements to add a call-to-action button in a column, outside of a text element. |
| Divider | Use divider elements to add a horizontal line (<hr>) in a column, outside of a text element. |
| Video | Use video elements to position a video from your video library (video hosted on external platform). |
| Code | Use code elements to add code snippets in between other design elements. |
| QR code | Use QR code elements to place an event-registration QR code in an email message. |
| Content block | Use content block elements to add a block of content that you can reuse in multiple emails, forms, and/or pages. |
The picture below illustrates a standard text element that has been added to a section with a single column in an email message.
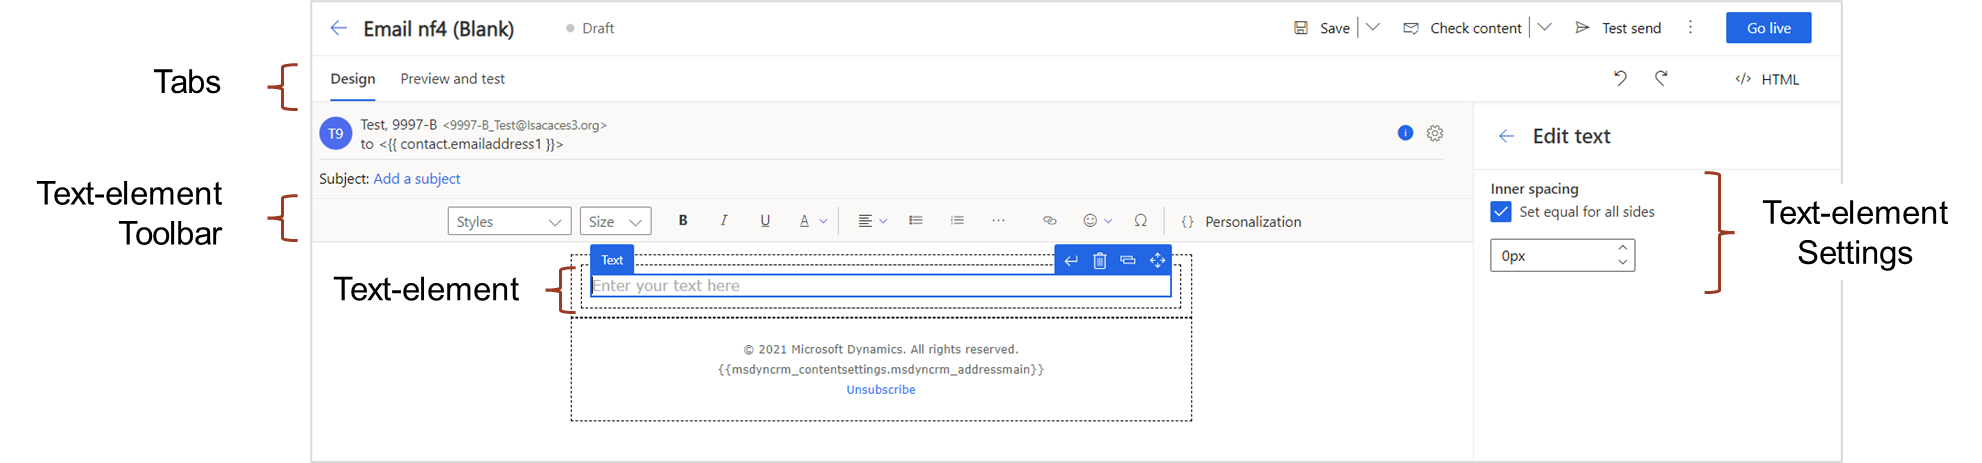
For each element you add, there are settings you can configure to change the appearance and/or behavior. The settings are different depending on the type of element you add. The picture below illustrates a fully-designed email.
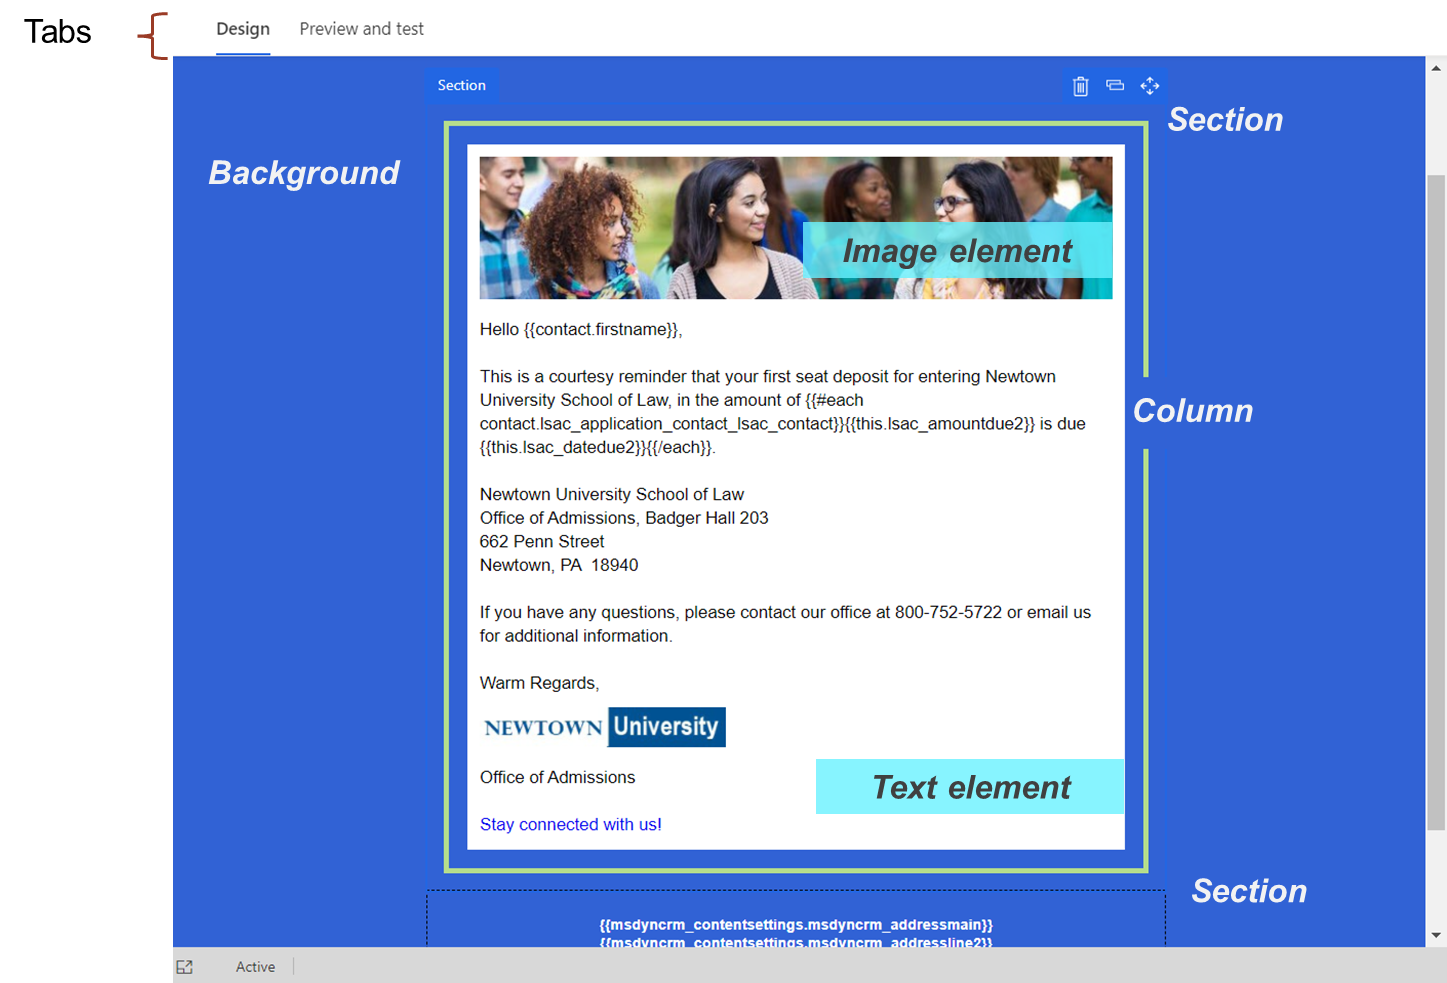
The background color is blue. There are two sections. The top section has one column with a white background color. The column has an image element and a text element. The image element includes one image. The text element includes static and dynamic content, an image, and a link to stay connected. The bottom section has one column with a transparent background color. The column has a text element with dynamic content and a link.
About the Preview and Test Tab
As you design your email messages, you may want to see how the email message will look on different devices. The Preview and test tab is where you see the message the same way recipients see the message on a desktop, tablet, or mobile device. The following picture illustrates an email message on the Preview and test tab.
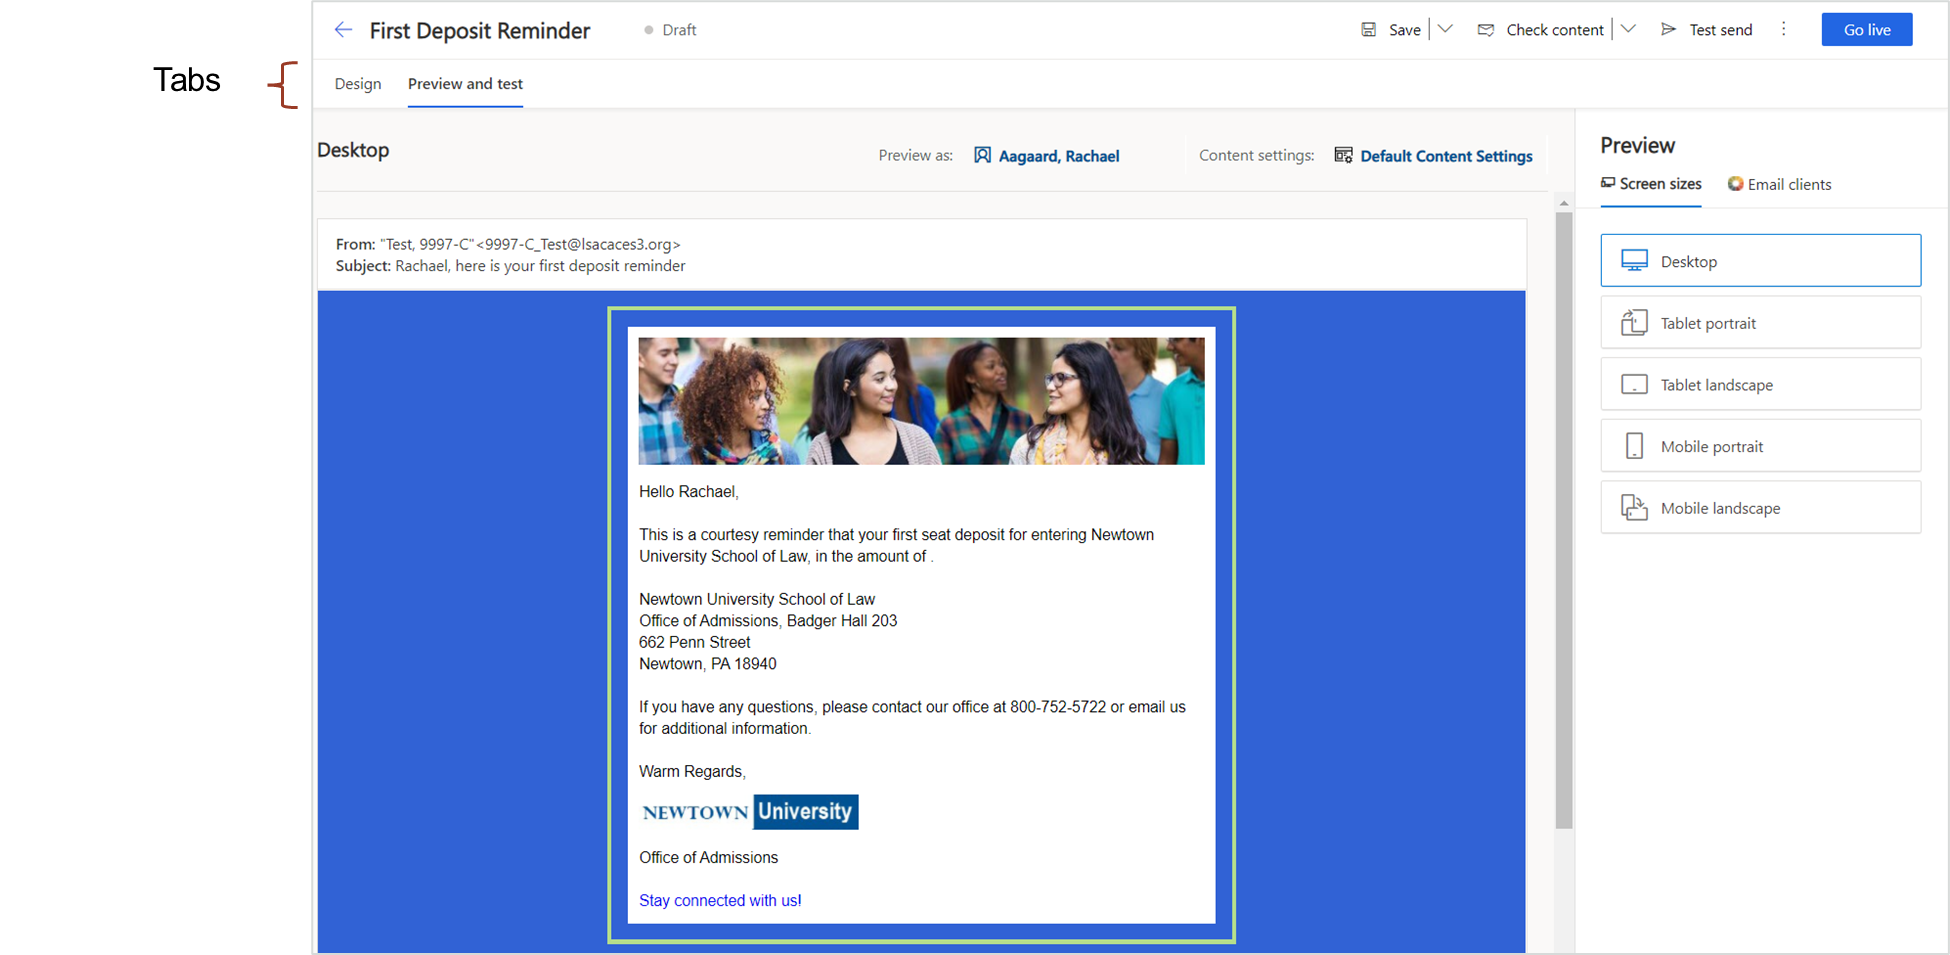
The Preview as field allows you to select a person record and see what the email looks like when dynamic content is populated. If your email message includes a for-each loop and your dynamic content does not render, try sending yourself a test message.
Insights tab
The Insights tab appears only if you publish an email. The Insights tab is where you see the latest analytics associated with the email record, including how many times recipients opened and forwarded the email, the delivery status, and the number of click-throughs on links.
As illustrated in the picture below, the Insights tab provides a menu of different types of metrics. There is an Overview tab, a Delivery tab, a Links tab, an Interactions tab, an Open times tab, and a tab for A/B testing. The following picture illustrates insights available on the Overview tab.
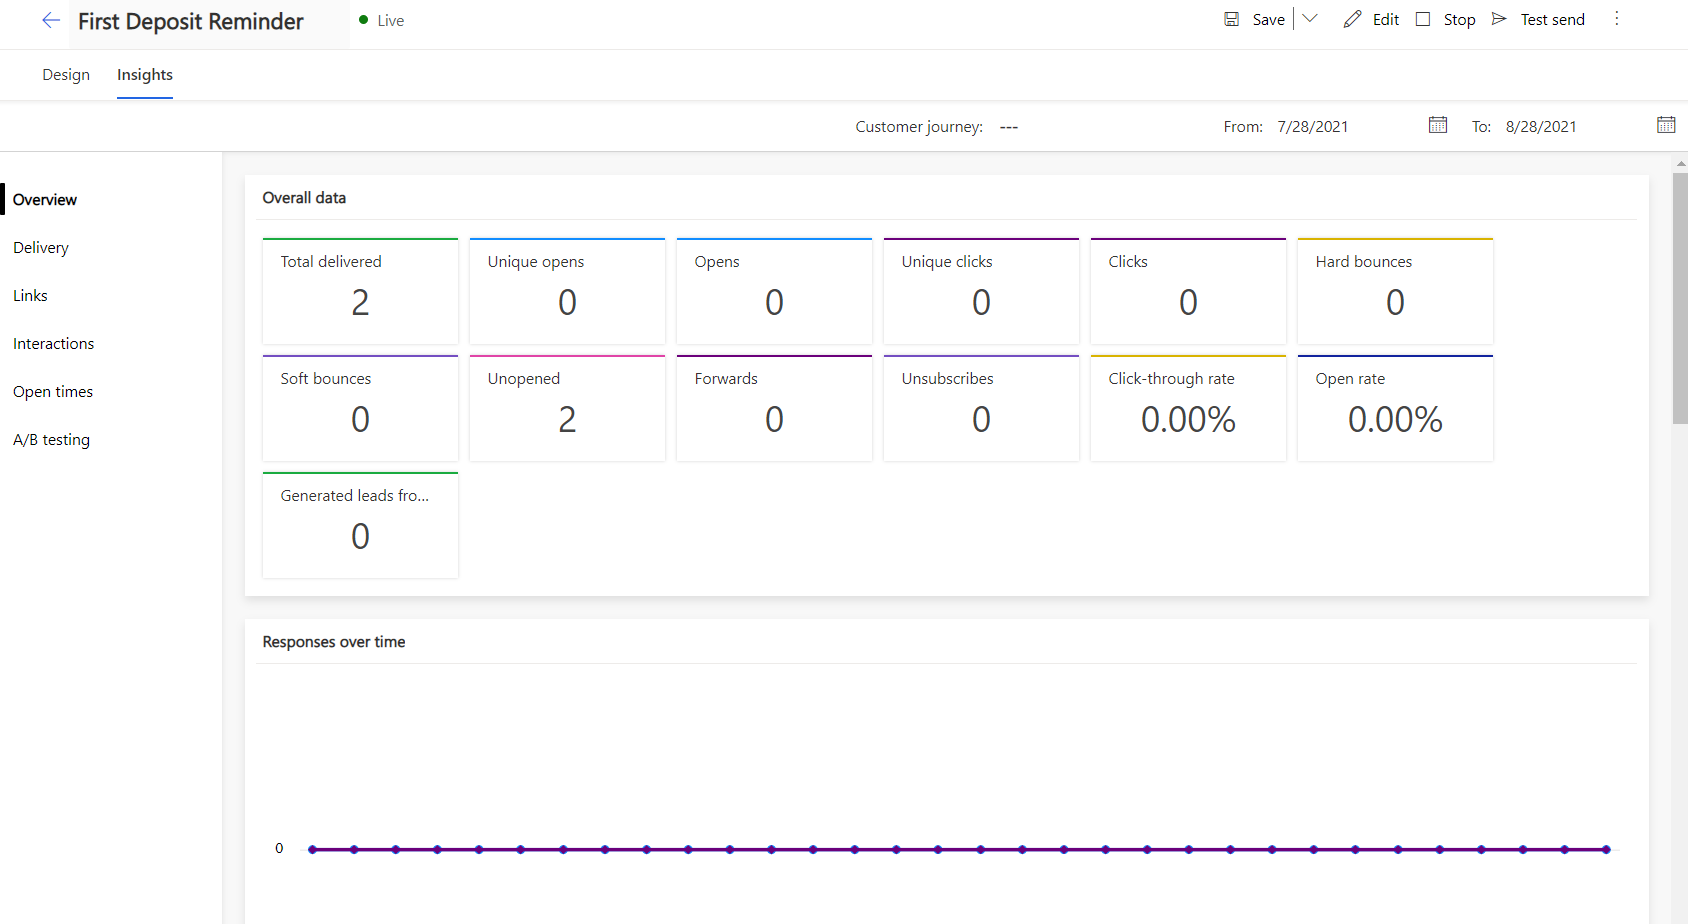
If you scroll down on the Insights tab, you can also see responses over time, send results per type, top ten links, and locations for recipients on an interactive map.