Considerations for Application Verification Checklists
For each FlexApp, you have the option to add a list of required items that need to be in place before applications are considered complete. Items may include documents, receipt of fees, signatures, important tasks, or any other item that needs to be verified before an application is assigned for review. The picture below illustrates an example Application Verification Checklist for a FlexApp designed for a transfer applicant.
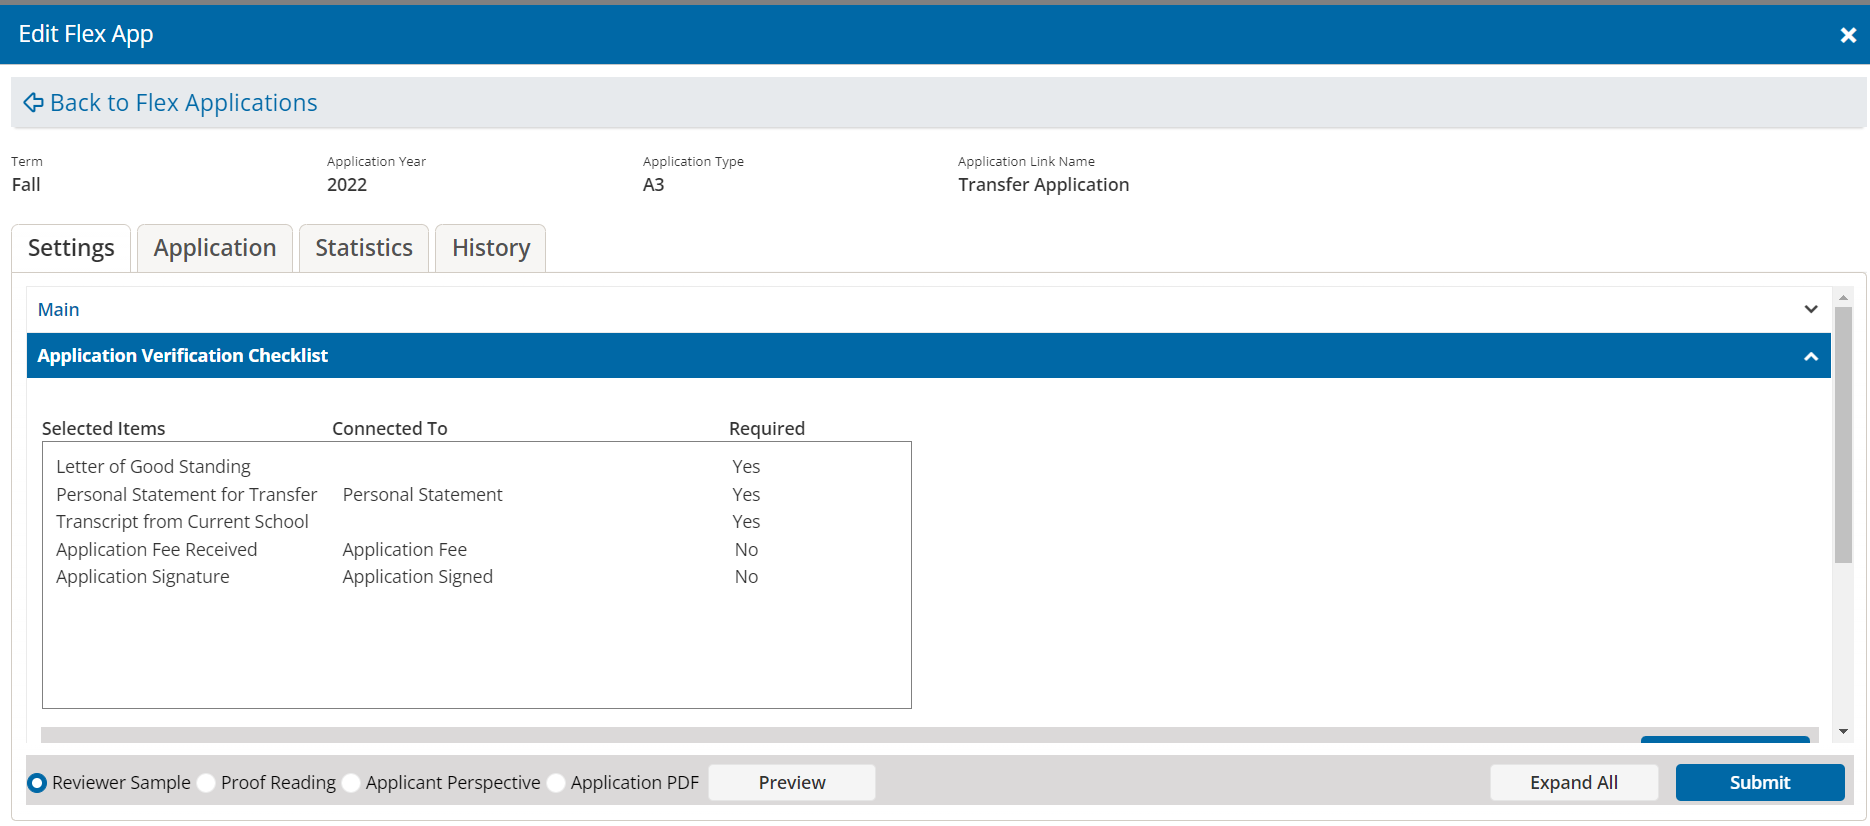
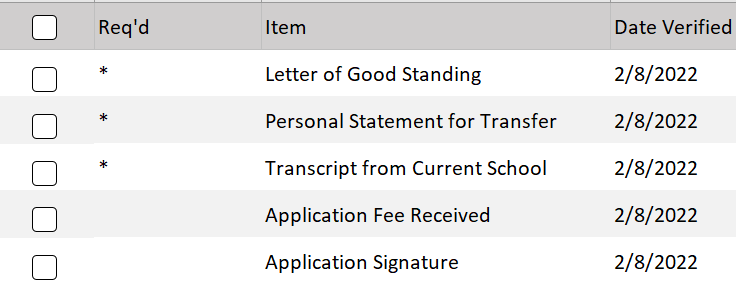
In the example above, transfer applicants would need to provide a letter of good standing, a personal statement for transfer, and a transcript from their current school. Plus, your school would like to have the application fee paid and the application signed before applications are assigned for review.
Any time you open an application from the APPLICATIONS area of Unite, the Application Verification page opens. As shown in the image below, this page is designed to help you verify information and track what is needed for the application to be considered complete.
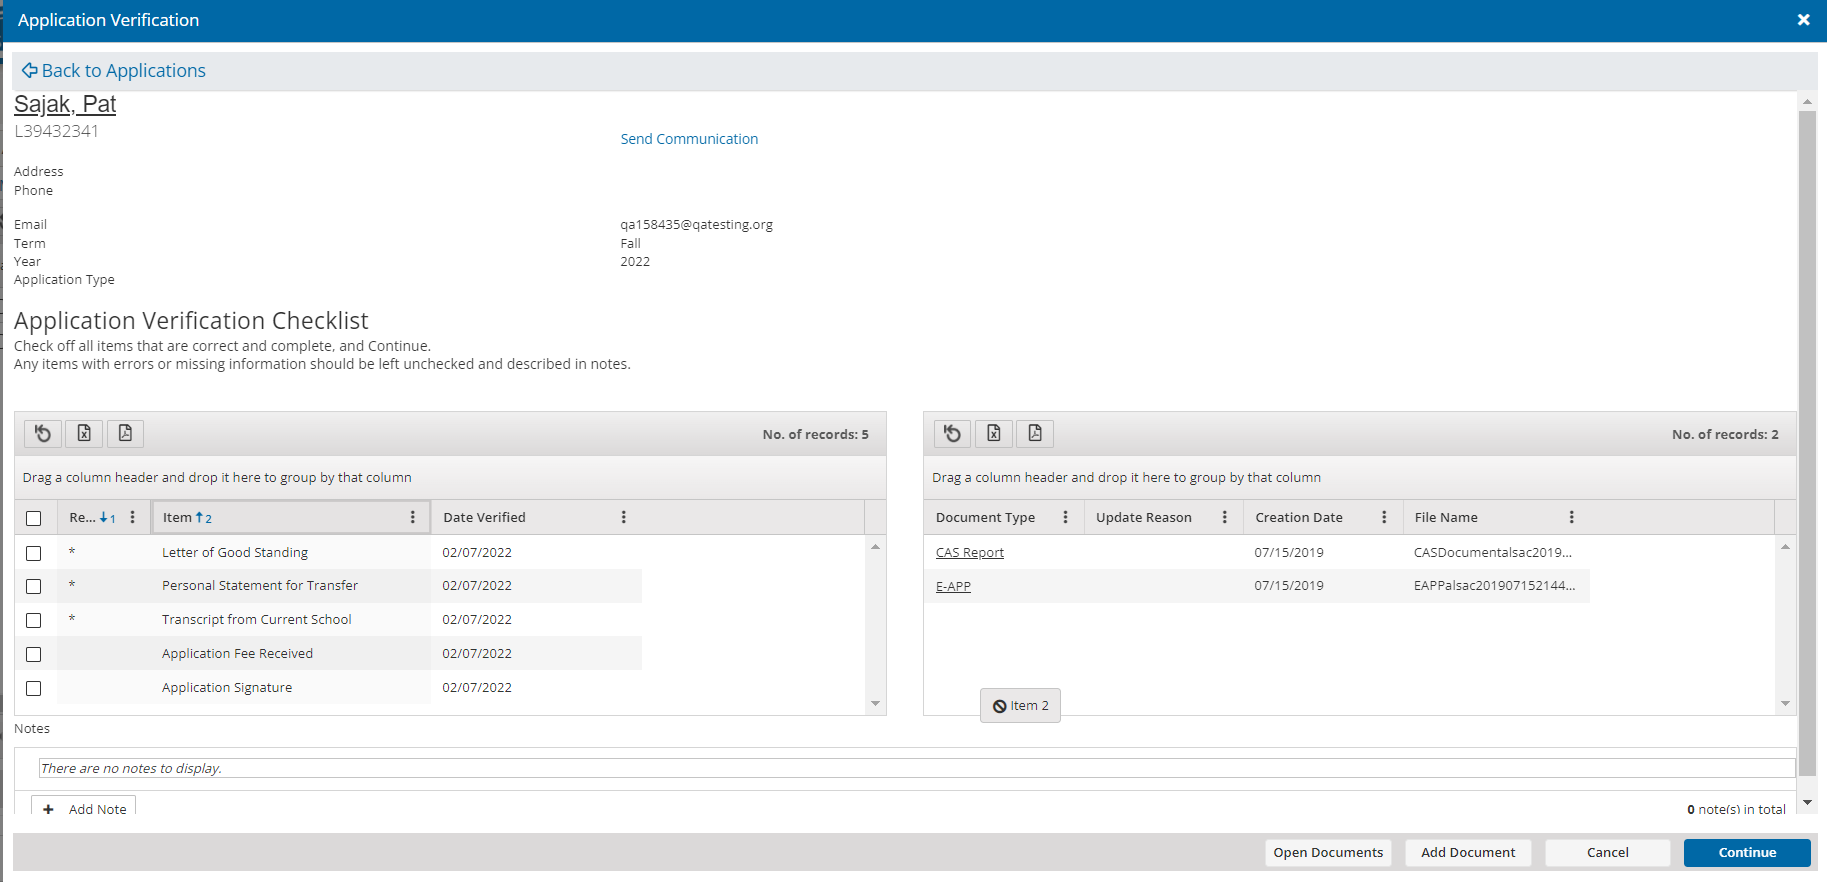
In the example above, the application verification checklist includes items for transfer application. You can check off items that are verified and know which items are needed.
Following are six considerations to help you create useful checklists and streamline the application verification process in Unite.
- Build a checklist for each type of application your school uses.
Consider setting up a verification checklist for each FlexApp so that Unite users get in the habit of using the Application Verification page to process applications. Schools often add different FlexApps to Unite to accommodate different types of applicants. The checklist items you add to one FlexApp might not apply to other FlexApps. For example, the items needed for a first-time applicant might be quite different from the items needed for a transfer applicant.
- Only include documents that are specific to the application, not the person.
If you are going to include documents as verification checklist items, only include documents related to applications and not people. In Unite, you can add documents to a person record and to an application record. The person record is where you add documents that are not application-specific, such as immunization records and English proficiency scores. The application record is where you add documents that are specific to the application. Since the Application Verification page only shows application documents, person documents would not be accessible to verify as part of an application.
- Consider how often you need to review and update each checklist.
Setting up application verification checklists is not a one-time task. Any time you add a new FlexApp, you will want to set up a new checklist. In addition, consider reviewing verification checklists annually or bi-annually as you update FlexApps to make sure they align with your current processes. Any changes you make to a verification checklist for a FlexApp take effect immediately.
- Consider whether you want to add items to a checklist.
You may want to include items that are not documents as part of your application verification checklists. For example, you may want to add a UDF check box to confirm you interviewed a person or to confirm the person signed the application. These items are not documents but may be important to verify before moving applications into a review process.
- Do not add the Eapp or CAS report as an item.
Depending on how you configure columns for the grids in the APPLICATIONS area of Unite, you may be able to see whether you have received an Eapp and CAS report right on the grid. Since Unite is already tracking these items for you, you do not need to add Eapp or CAS report as verification checklist items.
- Consider whether you want to link a checklist item to a field on the person record or application record.
When adding a checklist item to Unite, you have the option to connect the item to a field on the person record or application record. If you establish a link between a checklist item and a field, checking off an item on the Application Verification page may update a corresponding field on the person or application record and vice versa. This keeps all areas in Unite where you might want to verify application completeness up to date.
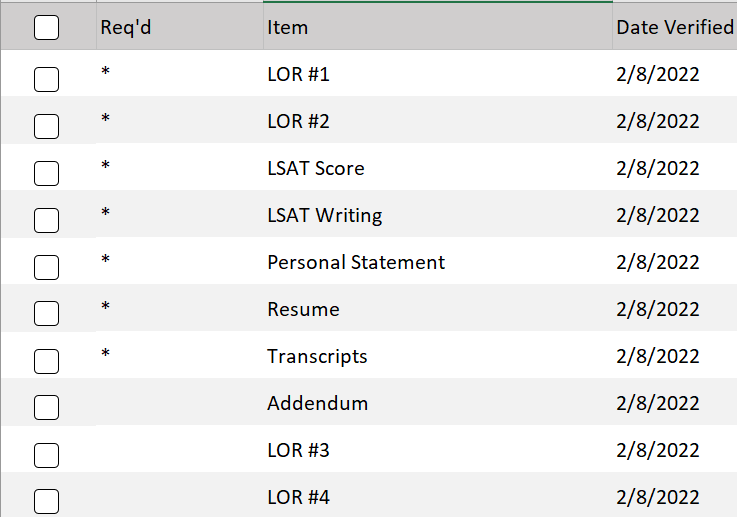
Example application verification checklist for new applicant
It is typical for most schools to use the A1 application for first time, full-time JD applicants. Required documents for the A1 application are likely to include the LSAT writing section, letters of recommendation, transcripts, a personal statement, and a resume.
Following is an example of a verification checklist for an A1 application that includes both required documents as well as optional, non-required documents like additional letters of recommendation and an addendum an applicant may provide. Required documents are listed with an asterisk in the Req’d column.
Example application verification checklist for transfer applicant
The application for a transferring student is likely to require a letter of good standing and transcripts from their current school. You may want to include entries for optional documents like a resume, any award or special recognition earned at an applicant’s current school, and a personal statement explaining reasons for wanting to transfer.
Following is an example of a verification checklist for a transfer application that includes an item that is not a document but, rather, a receipt of fees.
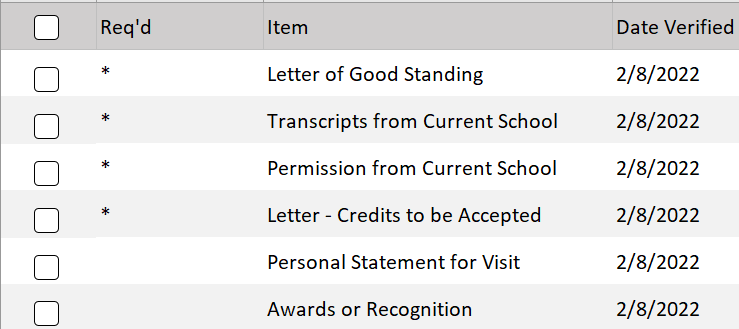
Example application verification checklist for visiting applicant
The application for a visiting student is likely to require a letter of good standing and transcripts from their current school, a letter from their current school indicating permission to visit, and the number of credits earned during the visit period that the school will accept. You may want to include entries for optional documents like any award or special recognition earned at an applicant’s current school and a personal statement explaining reasons for wanting to visit.
Following is an example of a verification checklist for a visitor application.